A tutor can use WLab without ever performing any student administration. When you add a student login name or ID to a lab, a student object is automatically created on the system and is populated from your institutional directory the first time they log in. There is no direct need for you to modify these student objects; however, you may wish to change certain settings on a per-student basis. Additionally, you might wish to check a particular student’s progress. The Students option on the tutor main menu provides this functionality. Select it and a list of students will be displayed; choosing one yields the following screen:
The fields displayed are as follows:
| Student Name | The student’s name. If the student has yet to log in to WLab, this will be blank. You can modify this name if you wish; such modifications will apply solely to WLab. | |
| ID | The student’s login ID. This cannot be changed. | |
| Max runtime | This is a value, in minutes, that represents the maximum amount of time the student can run their lab sessions for. If they reach this maximum amount of time, all their sessions will be suspended. They will not be allowed to resume lab sessions until an interregnum period has elapsed – this is to ensure that students cannot “hog” the system. | |
| Max advance bookings | So that students have some control over when they can work, a booking system is available to them. During a booking, they are allocated a guaranteed slot in which they can work on their labs, and their max runtime value will not apply for the duration of the booking. Each booking lasts an hour. The value in this field specifies how many such advance bookings the student may place. | |
| Max concurrent VMs | This value specifies how many virtual machines – essentially, how many labs – a student can have running at the same time. |
The Preview as student name button allows you to test running a lab from the perspective of a student. It will log you into WLab under the student's identity, meaning that you will see precisely what the student sees. In this mode, the student progress states are not set; however, any other changes you make in lab stage VMs are permanent and will be seen by the student. Before making any changes you should make a snapshot (see Other tips for tutors) so that you can easily revert back to the state you found the lab stage in.
At the bottom of the screen, all labs that have been published to this student are displayed, along with a colour-coded indicator that shows how far they have progressed in each lab.
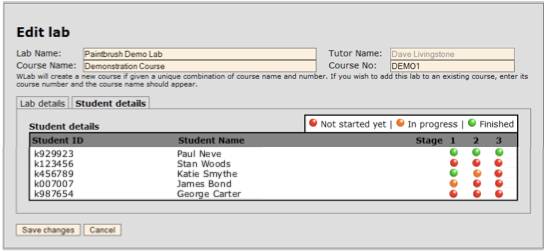
Student progress data can also be found in the lab editing screen – if you edit an existing lab, then select the Student Details tab, you will see progress indicators for all of the students to whom that particular lab has been published:
